|
To configure your Outlook Express or any other e-mail client, you need to know
your POP3 and SMTP servers. To find them out:
- Log into H-Sphere control panel;
- Select Mail Info in the Mail Info menu.
Your provider's mail server may use different SMTP relays for sending mail -
POP before SMTP or SMTP AUTH. In POP before SMTP, the relay system
collects your IP address when you authenticate yourself with the POP server,
and then permits SMTP relaying from that IP address for a short period of time.
In other words, if your server uses POP before SMTP, you need to check your mail
first, only then you can send your messages. If your mail servers uses
SMTP AUTH, you must configure your Outlook Express to send a login
and password not only when you receive mail, but also when you send it.
Ask your provider which relay the server uses.
- Configuring Outlook Express (POP before SMTP relay).
- Configuring with SMTP Auth relay.
Configuring Outlook Express
To configure this email client with the POP before SMTP relay:
- Open Outlook Express.
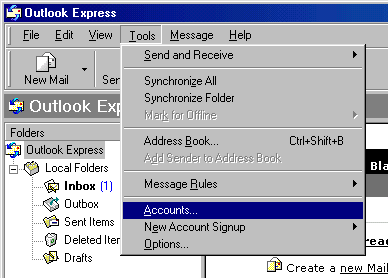
- In the menu bar, go to the Tools drop-down menu and select Accounts.
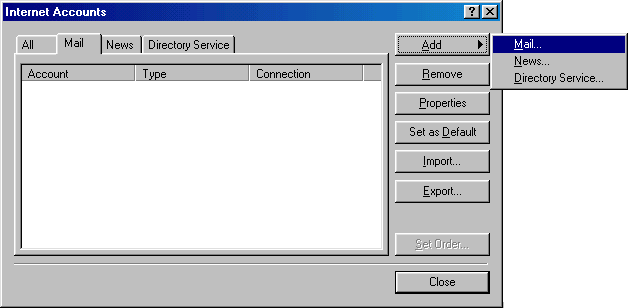
- On the page that shows, click Add and select Mail.
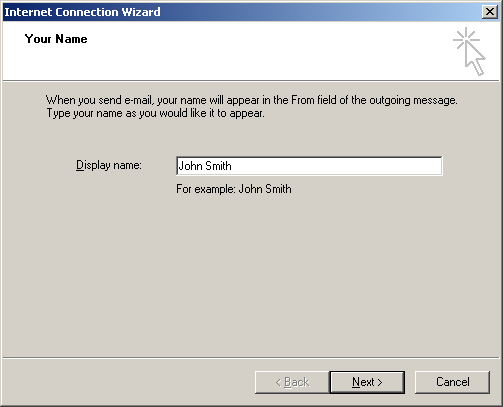
- On the wizard page that shows, enter your name in the field and click Next to proceed.
Note: this email will appear when you send out emails.
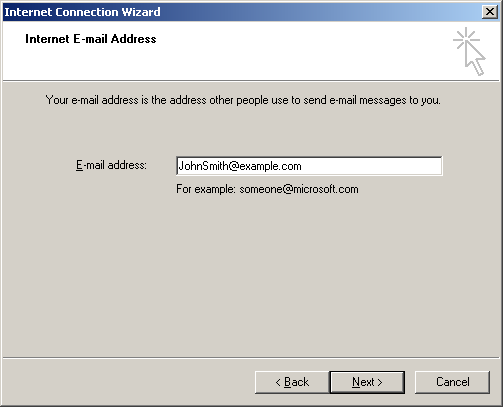
- On the page that shows, enter your Email Address and click Next to proceed.
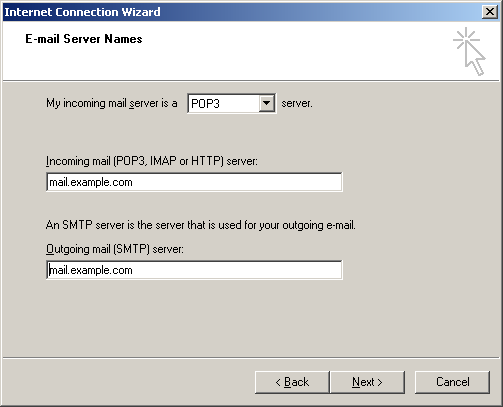
- In the form that shows:
- in the drop-down box, choose POP3 as your incoming server;
- enter the Mail Server Name for both Incoming Mail and Outgoing Mail;
- click Next to proceed.
- On the page that appears:
- make sure to enter full email address in the Account Name field;
- enter mailbox password in the Password field;
- check the Remember Password box to avoid entering it every time you check or send email;
- click Next to proceed.

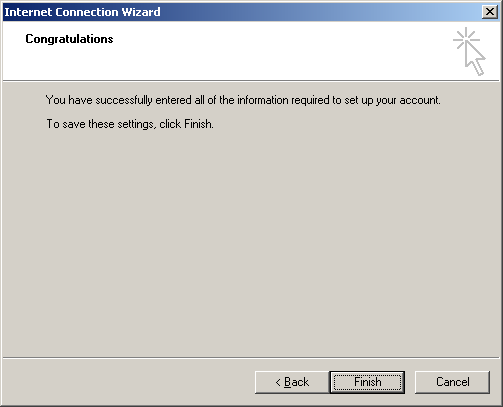
- On the page that shows, click Finish to save settings and get back to the list
of email accounts
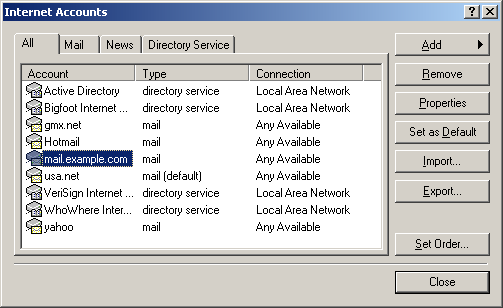
- Now that email account is created, select Accounts from the Tools drop-down
list in the menu bar.
- On the Internet Accounts window, select the newly created mail account and click
Properties to edit the settings for your email account.
- On the Properties page that appears, choose the General tab and check the
settings of your email account.
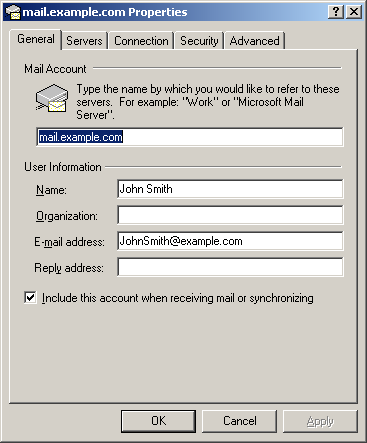
Here you can:
- set the name that will show in your letters
- set reply email (should be the same as email )
- Click Apply and OK to save settings.
Configuring Outlook Express with SMTP Auth Relay
You can set SMTP Auth relay right after your email account is created (steps 1- 8)
as described above. To set SMTP Auth, do the following:
- Select Accounts from the Tools drop-down menu in the menu bar.
- On the Internet Accounts window, select the newly created mail account and click
Properties to edit the email settings.
- On the Properties page that appears, choose the Servers tab.
- Check My server requires authentication box and click Settings on the right.
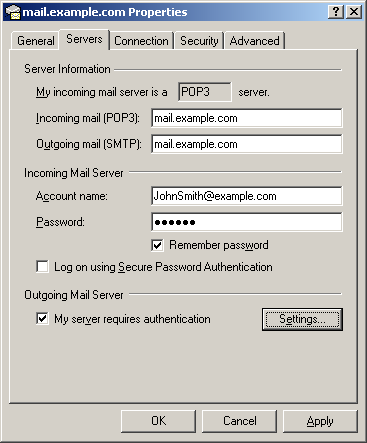
- On the Outgoing Mail Server window that shows you can:
- use the same settings as incoming server;
- enter account name and input another password for outgoing email.
Note: make sure to check Remember password if you don't want to enter password
each time you send out email.
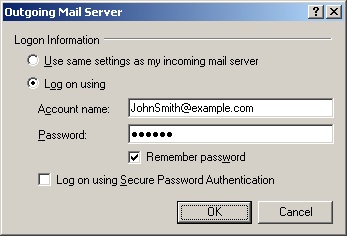
- Click OK.
- Back on the Properties page, click Apply and OK to save settings
and then close all dialog boxes.
Now that Outlook Express is configured, you can send and receive emails.
|